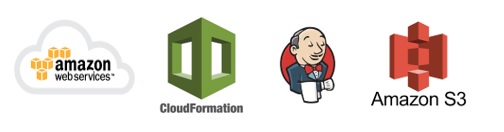
Our last chapters (Chapter 5, Chapter 4) introduced the process of creating multiple jobs in Jenkins. Now, lets check out on how can we create a job that initiates an AWS EC2 instance. We will leverage AWS CFN (Cloud Formation) technique for this example and use an existing JSON template to build EC2 instance.
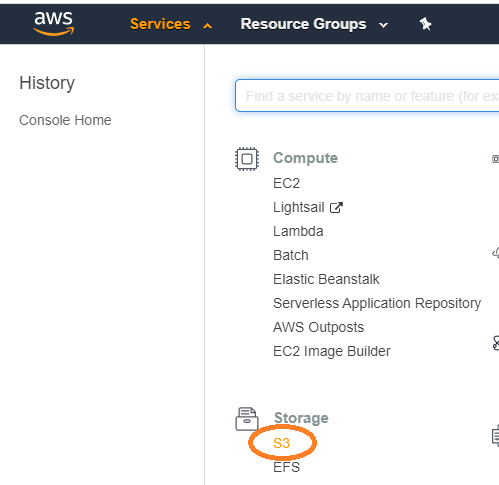
Step 1 -> Create S3 instance on AWS.
Access your AWS console and move to “S3” location to create a new bucket
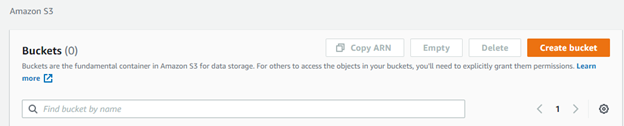
Click on the CREATE BUCKET button, visible on right side-
Give a name to this bucket “bucketexamples” and make it public (uncheck the option as shown below).
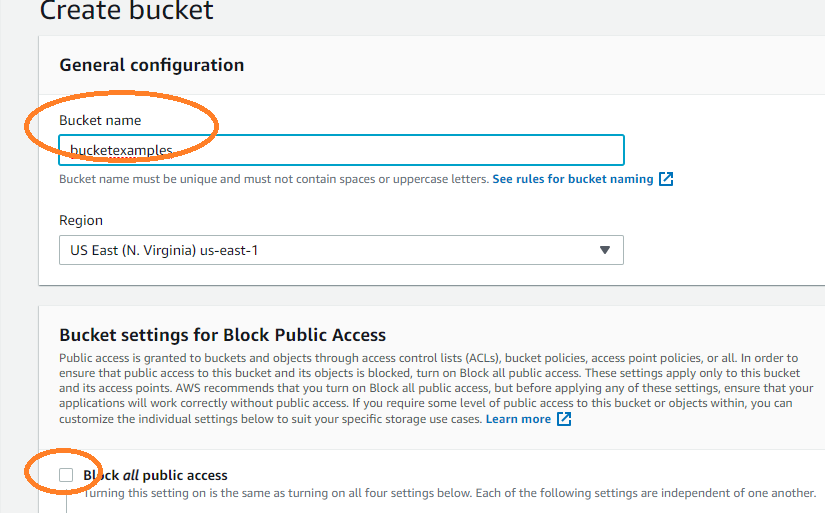
Do acknowledge the option for making this bucket public and click on the CREATE BUCKET button.
Note- AWS would look for unique names, in case the bucket name exists, it will prompt you change the name
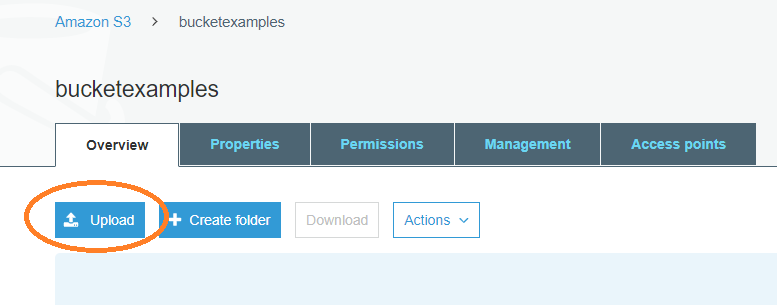
Step 2 -> Upload template json file.
Once the bucket gets created, open the bucket by clicking on the name. Click on the UPLOAD button to upload existing template file that creates EC2 instance on AWS – for this example we will consider the “EC2Template.json” that is available on this location.
Select and upload your file as shown below-

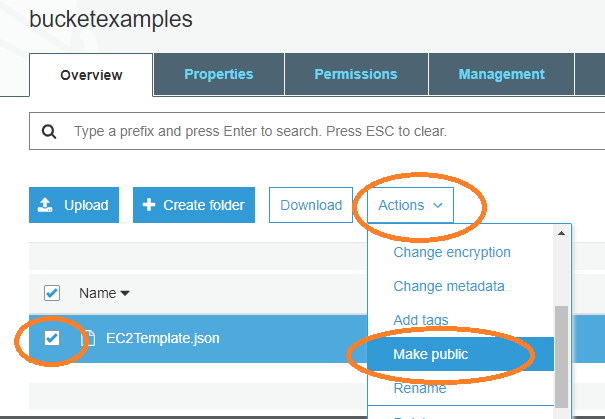
Leaving the rest options as is, finish the upload process. The json file gets visible on the console. Select the filename/object and make this object public as shown below (so that it is accessible from Jenkins)-
Step 3 -> Generate Key pair values and Access keys in AWS.
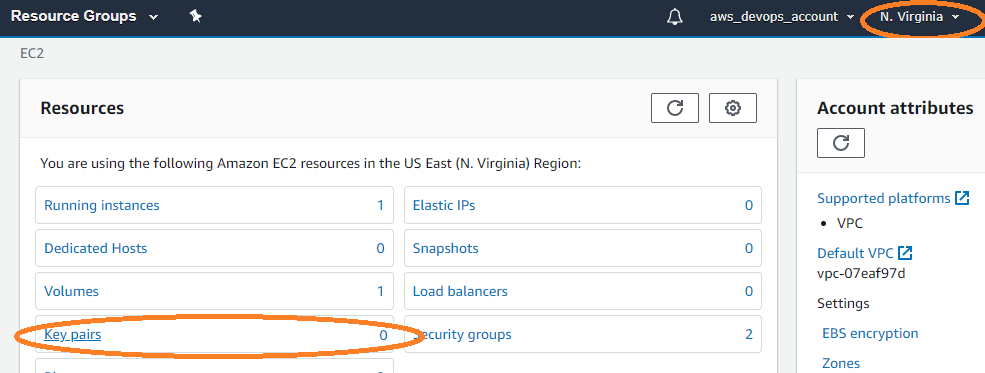
We now have our S3 bucket and the template file ready. Now, we need to create key pair values so that Jenkins gets the permission to create resources on AWS. For this, open EC2 section as shown below-

Do check for the AWS region that is selected on top right corner. And then click on the “Key pairs” link as shown below-
If you already have a key pair then you can leverage the same, else click on “Create key pair” as shown below

Give a name to this pair (remember this pair name), since we will refer this in Jenkins. For our example, we will name it “ec2keypair“.
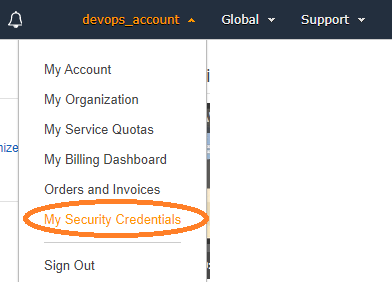
Along with this key pair values, you would also need AWS Access key and Secret value. For generating a new access key pair, open the “My Security Credentials” option from your account drop down as shown below-
If you have one pair then you can leverage the same in Jenkins or click on “Create New Access Key” as shown below-
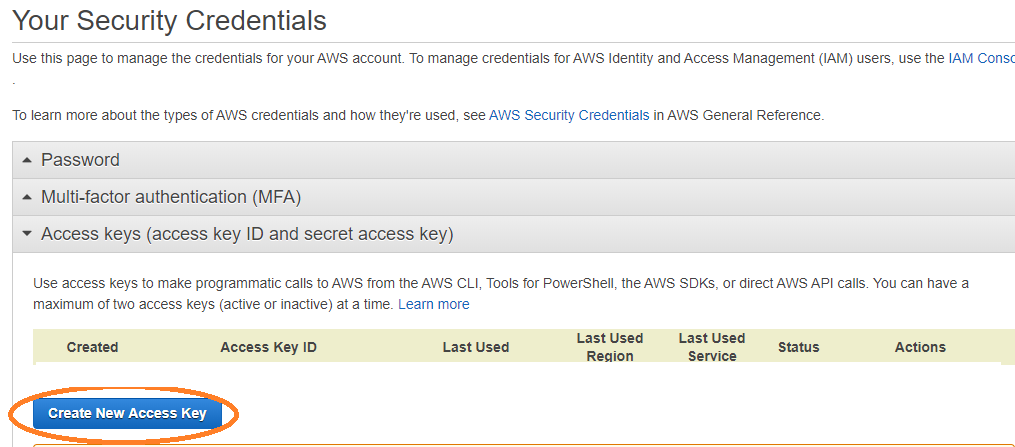
You can download a copy of this access key pair and refer it when we will define the build step in Jenkins.
Step 4 -> Install Cloudformation Plugin in Jenkins.
Access Jenkins -> Manage Jenkins -> Manage Plugins
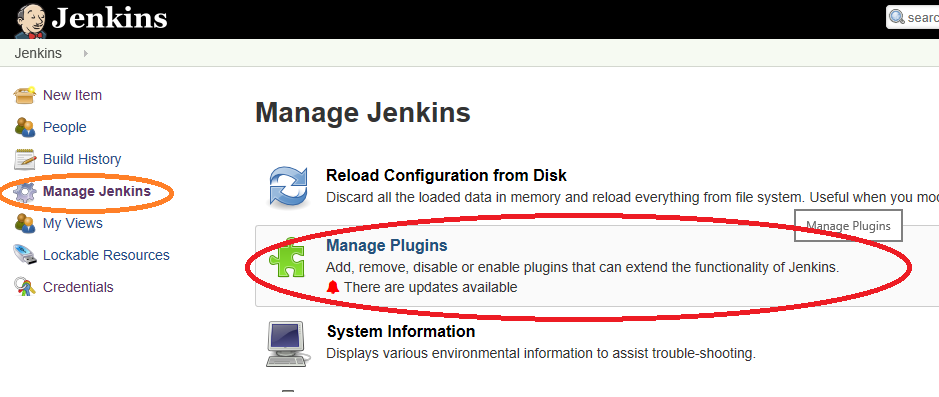
Search for the “jenkins-cloudformation-plugin” and install it.

Step 5 -> Create Freestyle Jenkins Project
Once the plugin is installed, do restart Jenkins and then create a new freestyle project.
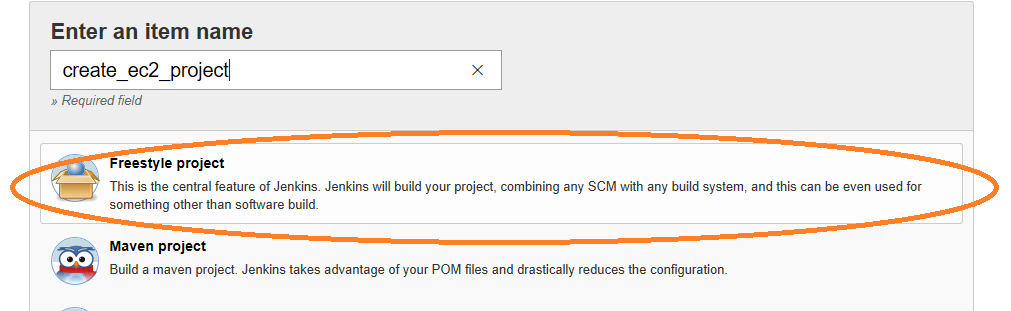
Lets configure this project now.
Step 6 -> Configure Jenkins project to create EC2 on AWS
Open the newly created Jenkins project and click on the BUILD tab and select the AWS CLOUD FORMATION option from the drop down as shown below-

Now, we need to mention the following –
AWS Region – where the EC2 instance will be created (this was visible on AWS console on top right corner, for our example we have selected North Virginia region)
CF recipe – location to the json which was uploaded in S3 bucket (this can be retrieved from AWS S3 console, select the json object, you will see the URL to that object)
Stack name – give a name to your stack that is getting created (this should be unique and will be created when the build runs)
CF parameters – this refers to the key pair value that we created in Step 3
AWS Access key – this refers to the AWS access key value (visible on AWS IAM console)
AWS Secret key – this refers to the secret value that comes with the access key.
Lets take a look at our example

Save the configuration for this project.
Step 7 -> Build Jenkins Project.
On the project consoled in Jenkins, click on the “Build Now” link on left panel-
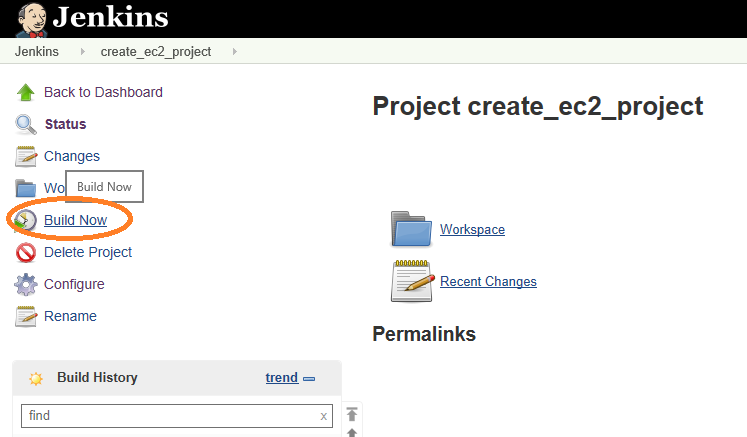
check out for the Console Output to see the progress….

As the build ends, you will see a Success message. To confirm on the newly created EC2 instance, check the same on AWS EC2 console –
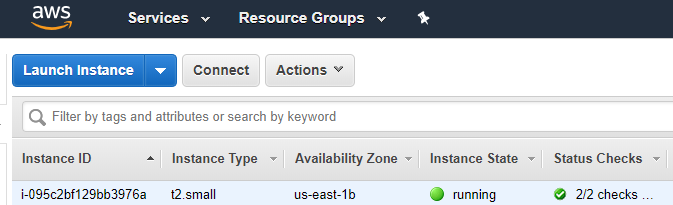
WOW !! Wasn’t that interesting ?? 🙂
The EC2 instance created belongs to the ‘t2’ instance type with default configs. Next time you can modify your S3 bucket object – remember the json file, just update that file for changes needed and re-run your Jenkins project build. Check out for yourself !!
Keep looking in this space for some more interesting chapters on Jenkins.