Azure Bicep and Azure Pipelines- Chapter 5
My first experience with Azure Bicep was pretty (click here if you want to learn the basics on Azure Bicep – Chapter 4, describes the pre-requisites and three simple steps to deploy a storage account through Azure Bicep). Next on my charter was to check on how Azure Bicep can be integrated with Azure Pipelines (in ADO). Azure Bicep does not save the state of the infra that is commissioned, it is all taken care by Azure itself. But the benefits of integrating an Azure Bicep file in an Azure Pipeline is to enable continuous integration and continuous deployment (CI/CD); hence this is useful for building simple use cases. A simple use case could be setting up a training environment and deploying some artifacts.
So, what do we need – we require an Azure DevOps (ADO) organization to just build an ADO project and a pipeline!! So, I had an ADO project called “demo_agile_project”, just accessed this project, created a bicep file and then started with my pipeline.
STEP 1: CREATE BICEP FILE: Open the “Repos” section, I already have a repo named “FirstRepo”; I will create a folder underneath this repo; naming it “deploy” and then will create my “main.bicep” file (the same file that we created in the previous article).

STEP 2: CREATE SELF-HOSTED AGENT: To run a pipeline, we will need an agent. You can either leverage Microsoft’s hosted shared agent or create your own self-hosted agent. Agents are created from the Project Settings option in the project.

STEP 3: CREATE AZURE PIPELINE: Open the “Pipelines” section and click on the option “Create Pipeline” to create a new pipeline.

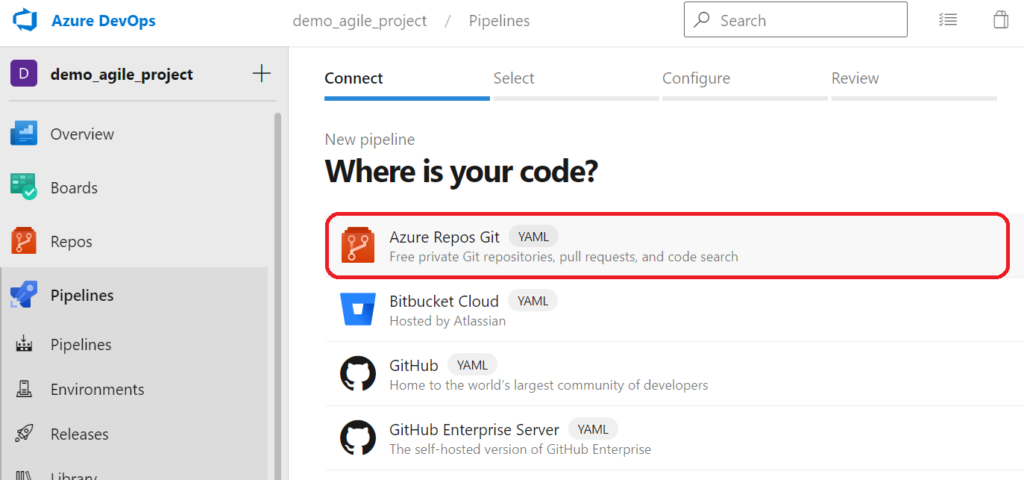
Each pipeline that we build, needs an Azure Repos Git repository.

We do get an option to either create a new repository or select an existing repository. I had an existing repo named “FirstRepo“, so just selected this as the repo where I will save my Bicep files.

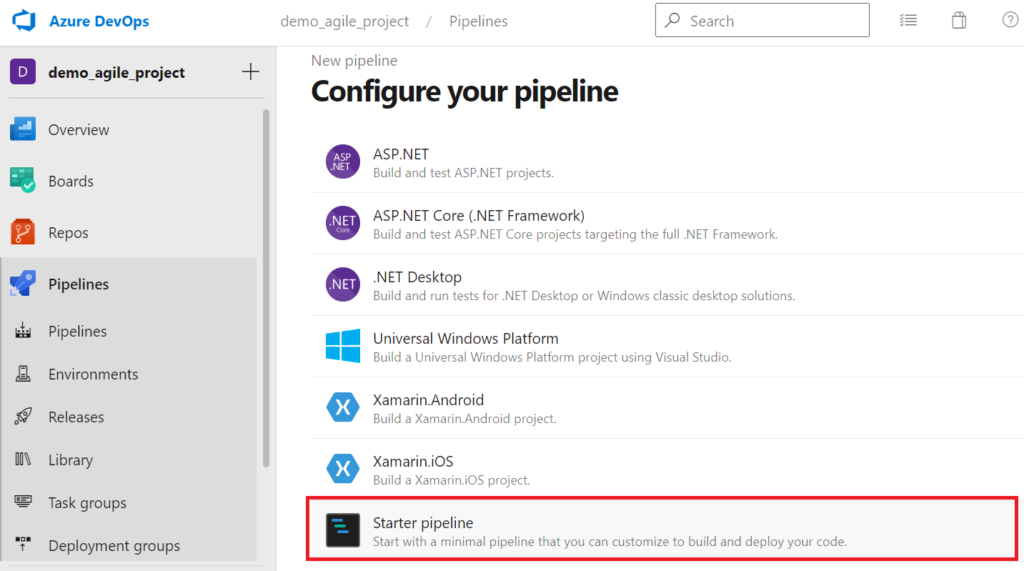
Once the repo is selected, the next step is to configure the type. We will select the “Starter pipeline” option for this repo.

Quick intro on a pipeline: A pipeline comprises of stages that are required to complete an action like CI or CD. For example, building, testing and deploying – are different stages that are created in a pipeline. And each of these stages will have different jobs that have an intended purpose.

The starter pipeline has a default YAML script. We will replace this script with the following, this comprises of variables and a step that deploys a storage account-
trigger:
- master

name: Deploy Bicep files

variables:

  vmImageName: 'ubuntu-latest'
  resourceGroupName: 'team_rg'
  location: 'eastus'
  templateFile: 'deploy/main.bicep'

pool:
  name: Default
  demands:
   - agent.name -equals SELF_HOSTED_AGENTNAME

vmImage: 'windows-latest'

steps:
- task: AzureCLI@2
  inputs:
    azureSubscription: $(azureServiceConnection)
    scriptType: 'pscore'
    scriptLocation: inlineScript
    useGlobalConfig: true
    inlineScript: 'az deployment group create --resource-group $(resourceGroupName) --template-file $(templateFile)'
You would have noticed that in this pipeline script we have mentioned a file named “main.bicep” that we had created in Step 1. Now, save this pipeline and check for its execution.

Once the pipeline is triggered, you can drill down to the pipeline to look at the stage at which it is running.

Each pipeline runs through the steps – and the “Pipelines” page displays the result of the job.

The pipeline authorizes our access to create the storage resource in Azure and then it creates a storage account with the name “team_storage*”. Access the Azure portal to look out for the new storage account that is connected with the “team_rg” resource group. Similarly, more infra components like VMs or DBs, etc can be staged and deployed or decommissioned.
Wow, that was simple again…… any similar use case that you have tried so far and found it useful? Please do share your experiences.


