Here we are again with a new chapter on CA’s DevTest solution. This time we will focus on how to create test cases in this tool. Lets get started ..
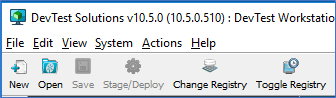
Step 1 –> Login into the workstation/tool with your defined credentials. And click on the top left corner to create anew test case as shown below-
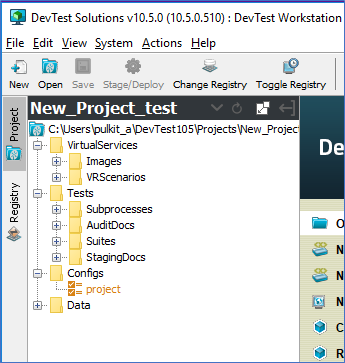
This will prompt for a project name – give a name to your first test project and click on the CREATE button. Lets name it “New_Project_test“. This will generate a pre-defined folder structure as displayed below-
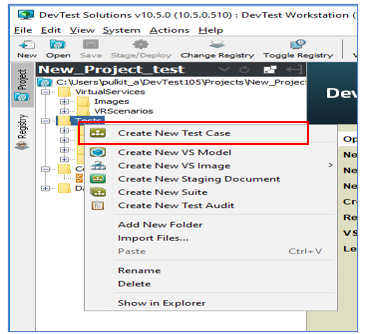
Step 2 –> Now, we have the repository where our test cases will be created and executed. We will now right click on the “Tests” folder under our project name to select the value named “Create New Test Case“-
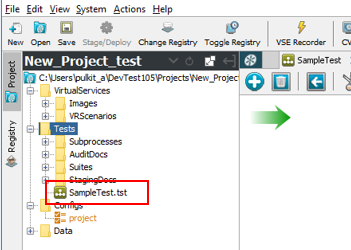
This will prompt for a test case name. Let us name it “SampleTest“. Click on the SAVE button. A new test case entry gets included underneath the “Tests” folder as visible below-
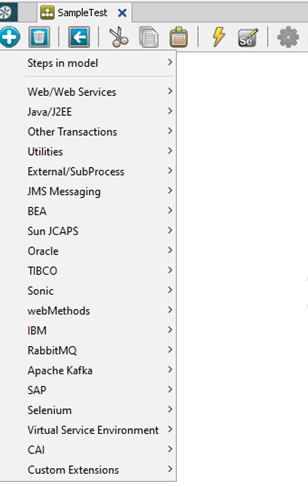
Step 3 –> We are ready with our first test case. While the left panel displays the test project and the related test cases. On selecting the test case name, you will find a test case editor being opened at the right side. This editor has a toolbar that has various options needed to create a test case like making calls to APIs, calling external commands, running database queries, Selenium scripts, etc. If you hover over the “+” button in the editor, you will be able to see various options like –
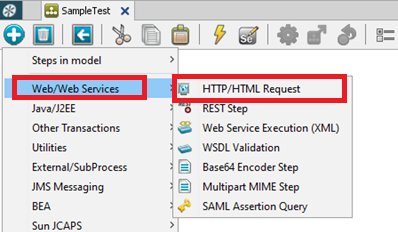
Assume we have to test whether a given URL is accessible or not. So, we need to test HTTP response; hence will select an option name “HTTP/HTML Request” as shown below-
This will prompt you to specify the protocol, HTTP address, method calls, etc as displayed below-
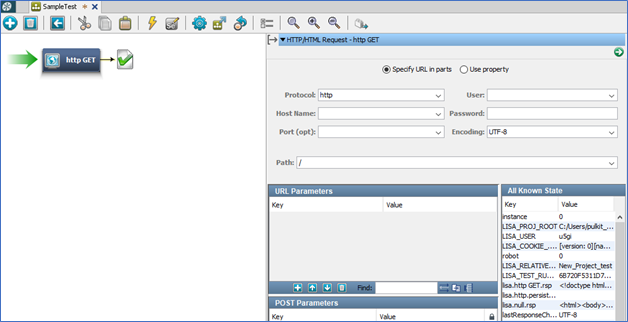
This is the first step to be tested in our test case.
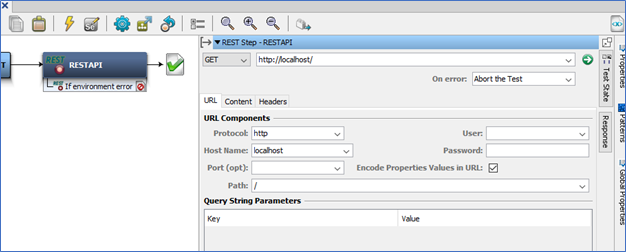
Step 4 –> Repeat Step 3 in case you need to perform or test other components in the same test case. For example, after checking the web request, you need to check for an API call. Insert the same and mention the details
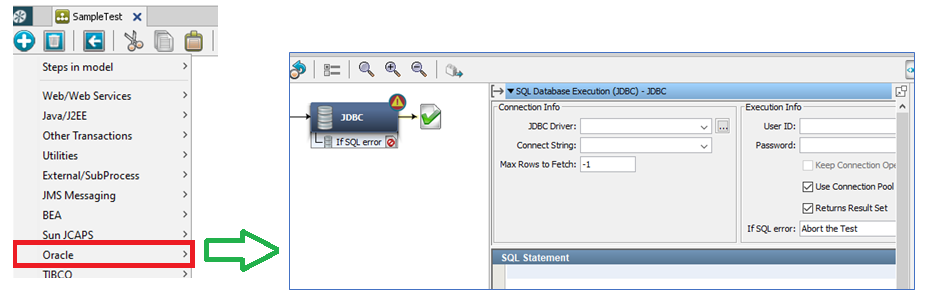
Also, if you need to execute a DB query, you can do that as well. Just select the option from the “+” symbol and select the relevant option as shown below-
Step 5 –> Once the test case is ready with the needed steps, then it is time to execute it. Click on the wheel button on the toolbar –

The test runs and returns the status as Pass or Fail for every step that we create. That’s it for now… but yes the upcoming chapters will focus on use cases wherein we will create a Test Suite and run few test cases and also understand the results that get generated.
Keep watching this space!!
Links to previous chapters-