Installing Jira – Chapter 2
The last chapter introduced Agile and Jira and in this chapter we will take a quick look on the steps to install Jira v 8.5.4 (Atlassian offers trial licenses for beginners) –
Step 1 -> Download and save the latest version from the official Atlassian website- https://www.atlassian.com/software/jira/download
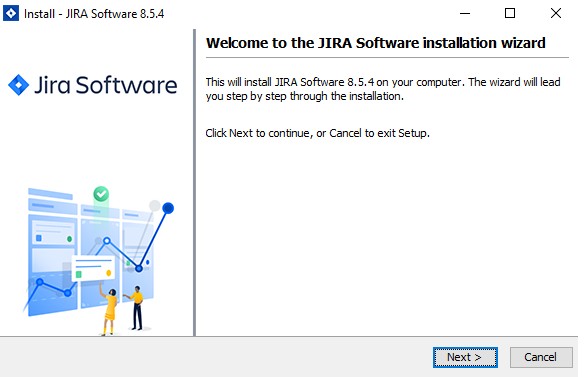
Step 2 -> Initiate the installer (ensure you have admin rights), you can select the default options or choose to update them like updating the port number to access the web application. By default, the application runs on 8080 port, if you wish to change the port, you can mention the same.
Step 3 -> Post successful installation, the installer will open the Jira application in a web browser or you can check out the same by typing in the URL as http://localhost:<<portnumber>>
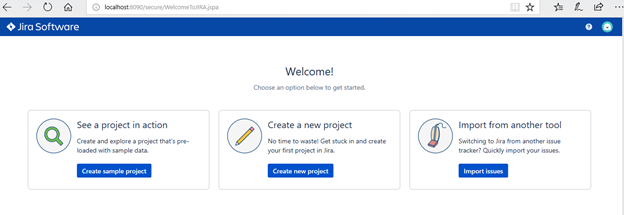
The web application will prompt for Jira setup –
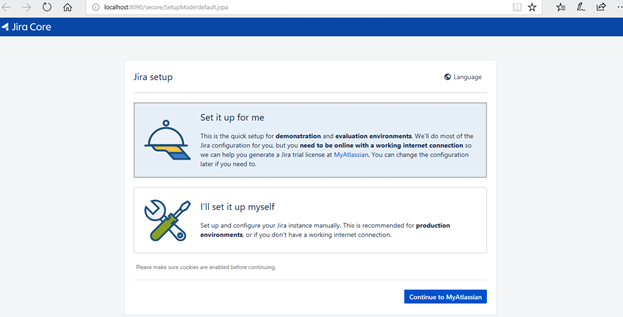
You can choose the default option ‘Set it up for me‘ and proceed ahead. Create or Login with your account details-
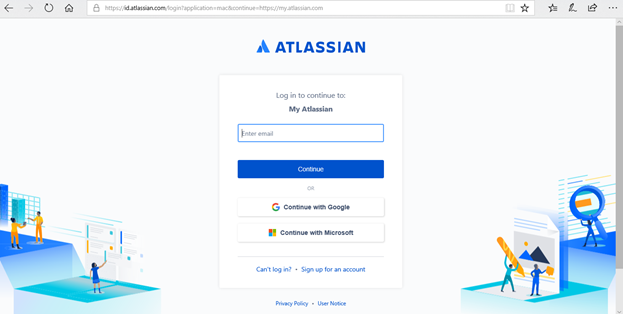
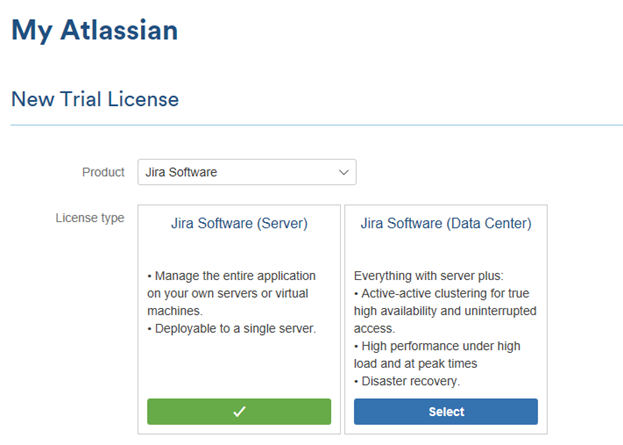
Once you login on the portal, choose the Jira version and the portal will generate a trial license-
Step 4 -> Once the setup is configure create an ‘Admin’ account-

Step 5 -> Once the admin account is created, select the language and avtar 🙂 And your Jira is ready to use 🙂
Check out for more chapters on using and configuring Jira!
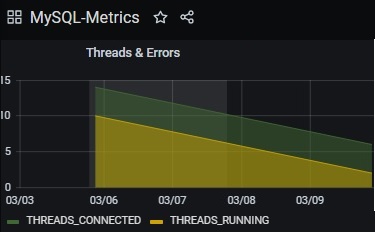
MySQL Performance Metrics in Grafana
Introducing PowerShell ISE – Chapter 1
Try the new HCL Accelerate on HCL SoFY!!
About The Author
ramz
A DevOps Practitioner with 23+ years of IT experience. She started her career as a developer, later graduated into different roles in the product lifecycle. Over the past decade, she has been providing consulting to a number of customers across the globe on adopting and practising DevOps and Agile, implementing tools and technologies to increase automation, tracking their maturity levels through metrics/OKRs, and in the recent years experimenting AI-based solutions. She co-authored a book named "Hands-On guide to Agile Operations", available at amazon.com She is the chapter lead for the Toronto region for the Canada DevOps Community. Ref: https://www.linkedin.com/in/raminder-devops-practitioner/