Once a project gets created (take a look at previous chapter), we should configure the project. When we talk about configuration, we refer to customizing the issue types and the workflow. Lets get started with updating project workflow in this chapter!
Step 1 -> Login into the JIRA and click on the PROJECT SETTINGS link on the left panel as shown below-
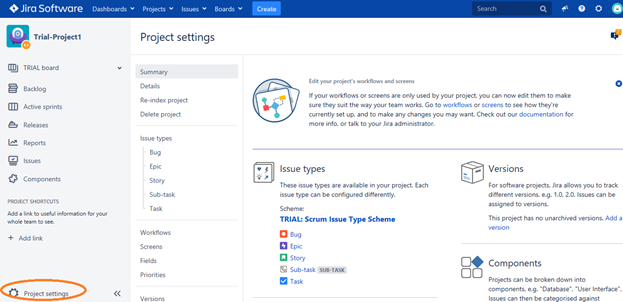
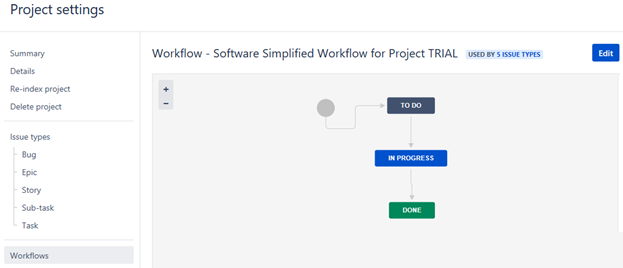
Step 2 -> Click on the “WORKFLOWS” link as shown below, the page shows the default workflow named ‘Software Simplified Workflow for Project TRIAL’. Every project inherits the default workflow process which can be customized as per the project needs.
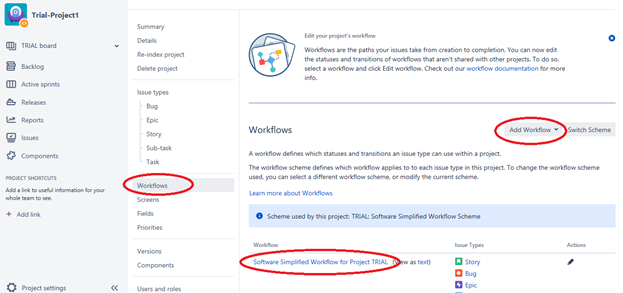
Step 3 -> Click on the link ’Software Simplified Workflow for Project TRIAL’ to view the default workflow-
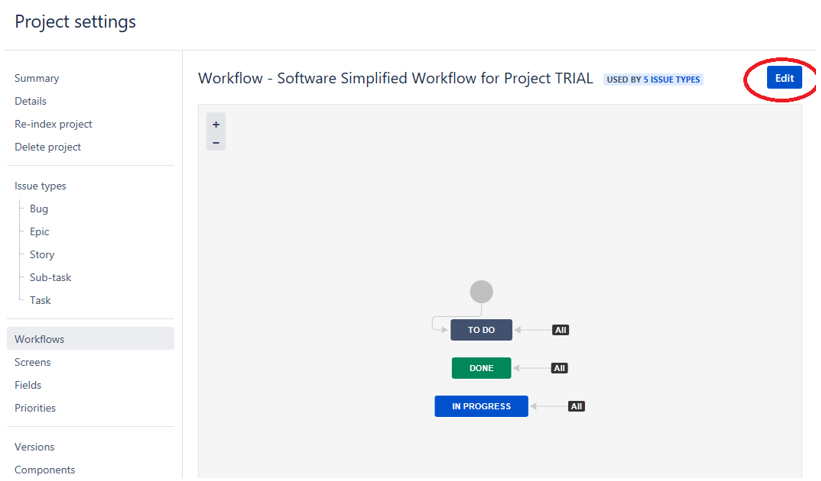
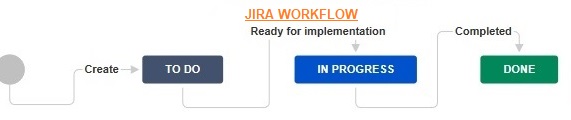
The above (default) workflow has three states- TO DO, PROGRESS and DONE and are associated with a transition – which means the triggering point that changes the state from one form to another.
Step 4 -> Click on the ‘EDIT’ button (visible on top right corner) to add new states and transitions.
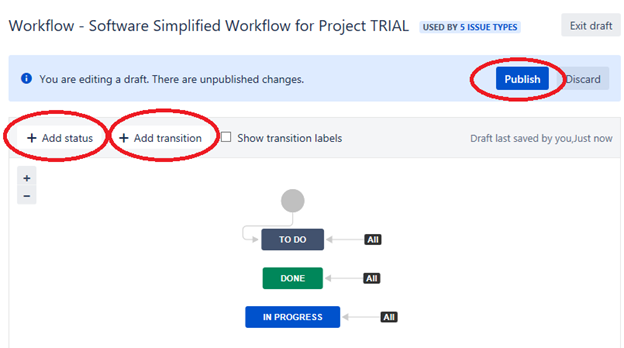
You can drag and drop the existing icons to make the workflow user friendly. You can select each state / transition to check on its related properties. You can delete and update the existing entities on the workflow. The above workflow conveys the following –
- Every issue will be placed in TO DO state at any given point in time
- At given time, issues can be placed in IN PROGRESS or DONE state as well
- The “ALL” listed against each state signifies the transition
- Issues are moved between states by the Scrum Master / Agile SPOC
Let us update the workflow to convey the following –
- Each state should start with TO DO state, which indicates that the issue has to be planned
- Post team discussion, when the issue is to be resolved / implemented, the Scrum Master / Agile Owner moves the state from TO DO to IN PROGRESS state
- And when the issue is completed, then the Scrum Master / Agile SPOC moves it to the DONE state
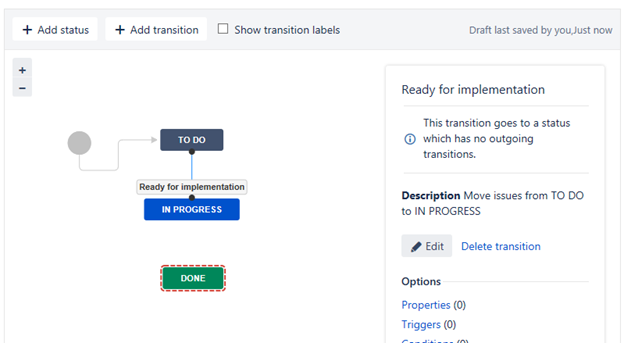
To perform the above activities (steps i,ii,iii) , select the ALL transition and delete it. Click on the ADD TRANSITION button to add a new transition flow.
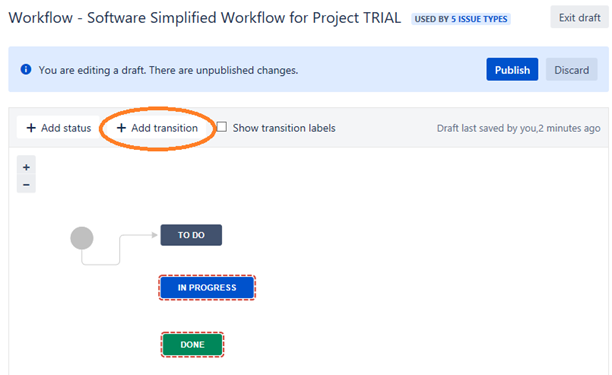
When the state has to be from TO DO to IN PROGRESS, we will add a new transition state named ‘READY for IMPLEMENTATION’.
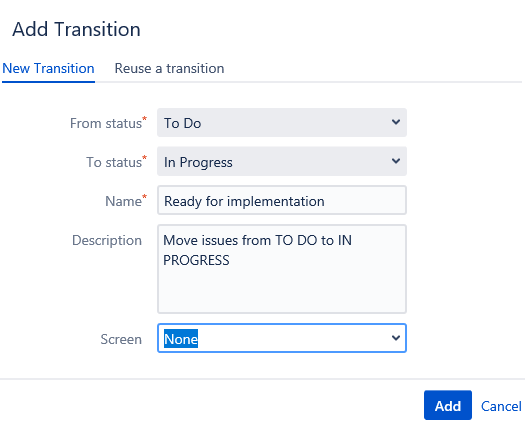
Click on the ADD button and view the new change-
Repeat the same process to add another transition state that is triggered from IN PROGRESS to DONE state. Let us click on the ADD TRANSITION button to create a new transition state as shown below-

View the updated workflow-

Step 5 -> Now click on the PUBLISH button to view the updated workflow for the project TRIAL-
Few tips-
* Its advised that changes to workflows are made before creating issues in the project so that there is consistency across issues and their states.
* While you can create many states and transitions but it is good to keep the workflows simple
* State and Transition names should relate to the project phases and activities. For example, for a Dev project you can have states like-
TO DO -> DESIGN -> CODE -> REVIW -> TEST -> DEPLOY
In the next chapter, we will focus on customizing and configuring issue types – click here for Chapter 5.
Happy Exploring !!